This section shows you how to install and run AUTOMATIC1111 on Windows step-by-step.
Please make sure your system meets the following requirements:
- Windows 10/11.
- A graphics card with at least 4GB of VRAM.
- 12GB or more install space. Ideally an SSD.
Step 1: Install python
You will need Python 3.10.6 to run Stable Diffusion. Select the 64-bit windows installer, or use this direct download link.
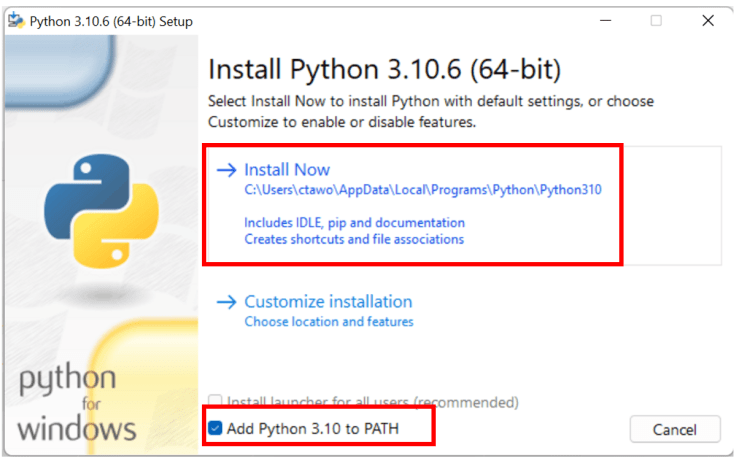
Make sure “Add Python 3.10 to PATH” is checked. Click “Install Now” to start the installation.
If you encounter an error, it’s most likely because you have previously installed Python. Remove any previously installed Python versions before re-installing 3.10.6. You can do that in Control Panel → Add or remove programs.
If you encounter an error of not finding Python in later steps, try installing Python 3.10 on Microsoft Store.
Step 2: Install git
Download git from the git website and run the launcher.

Step 3: Clone web-ui
Press the Window key (Should be on the left of the space bar on your keyboard), a search window should pop up. Type cmd.
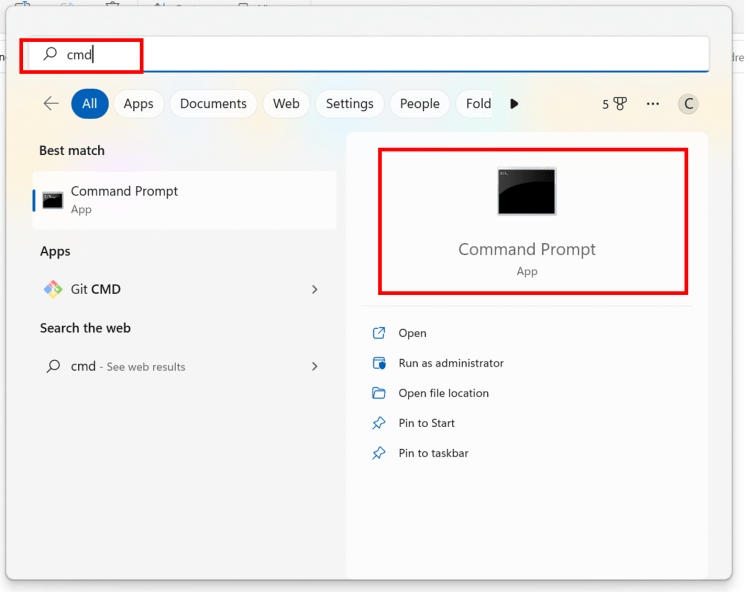
Click on Command Prompt. The command prompt window would show up.
First, make sure you are in your home folder by typing the following command and then pressing Enter. (Tip: You should be able to use right-click to paste in Command Prompt.)
cd %userprofile%
You should see your prompt shows something like C:\Users\YOUR_USER_NAME>.
Next type the following command and press Enter to clone the AUTOMATIC1111 repository.
git clone https://github.com/AUTOMATIC1111/stable-diffusion-webui.git

A folder called stable-diffusion-webui should be created in your home directory.
It’s ok to clone the repository in a different folder instead of %userprofile%, as long as you can find the newly created stable-diffusion-webui folder. You will need to change the folder location accordingly in the following steps.
Step 4: Download a model file
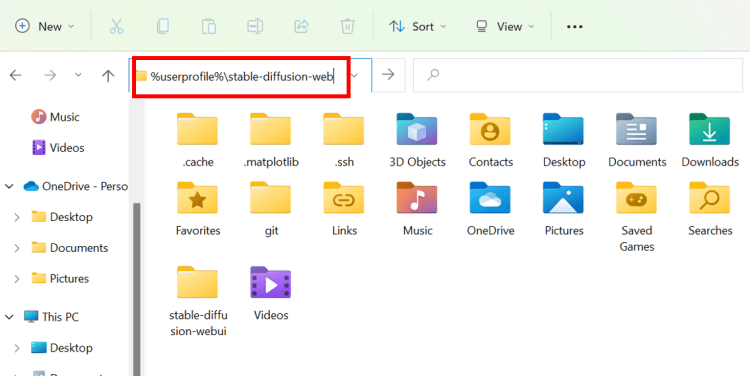
Next, go to the newly created folder in File Explorer. Put in
%userprofile%\stable-diffusion-webui
in the address bar and press enter.
Navigate to the folder models and then Stable-diffusion. You should see a file Put Stable Diffusion checkpoints here.txt like below.
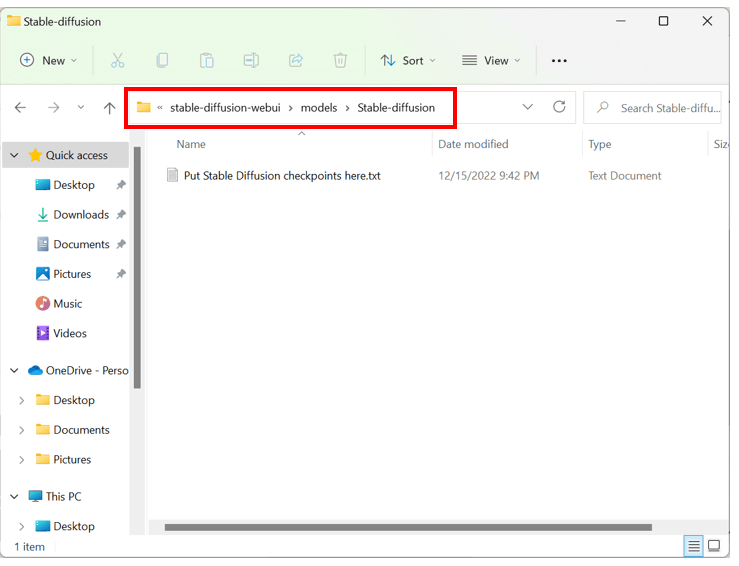
Download the Stable Diffusion v1.5 model checkpoint file (download link). Put it in that folder.
Step 5: Run webui
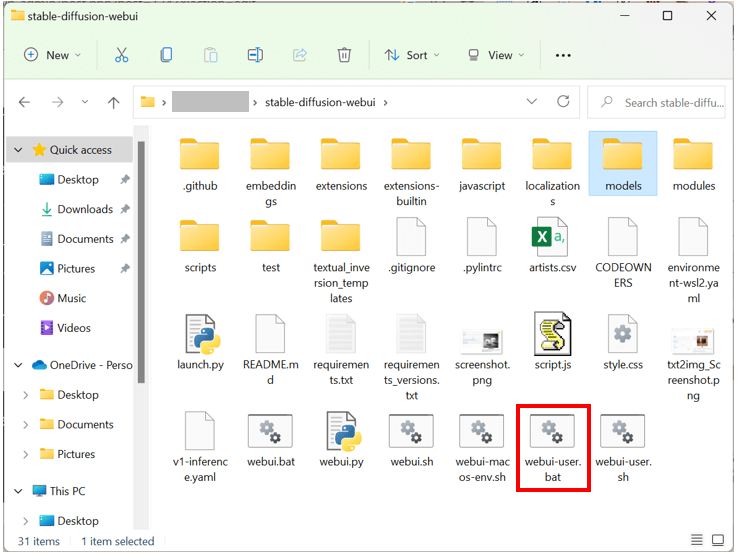
Now in File Explorer, go back to the stable-diffusion-webui folder. That is, go back up two levels or type
%userprofile%\stable-diffusion-webui
again in the address bar.
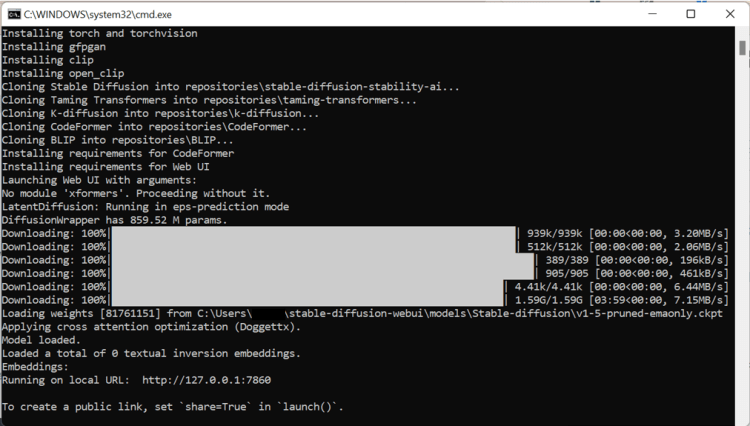
Find a file called webui-user.bat. Double-click to run and complete the installation.
This last step is going to take a while. When it is done, you will see a message
Running on local URL: http://127.0.0.1:7860
like below.
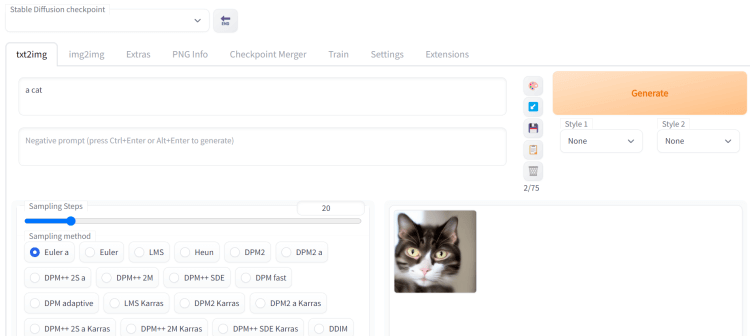
In your web browser, go to the URL
You should see the AUTOMATIC1111 webui! Put in a prompt (e.g. “a cat”) and hit Generate to test if Stable Diffusion is running correctly.
When you are done using Stable Diffusion, close the cmd black window to shut down Stable Diffusion.
To rerun Stable Diffusion, you just need to double-click the webui-user.bat.
Here is a how-to-use guide for beginners: How to use Stable Diffusion